
In my Map Overview, I discussed how maps determine the viable strategies in the game. This map is a good example as it showcases how victory conditions, Heroic Team, and initiative comes into play.
Victory Condition
There's two ways of winning in Hero Academy: by eliminating all of your opponent's Units, or by destroying all of the opponent's Crystals.
Personally, my default strategy is to eliminate all of my opponent's Units (if you eliminate all of their Units, they can't destroy your Crystals). In this case, however, there are certain advantages to going after their Crystals.
At first glance, this map looks symmetrical: the Crystals (C2 and G2, B5 and H5) and Attack Boost Square (C3 and G3) are in identical positions. However, the location of the Defense Boost Square (E1) and Assault Boost Square (E5) are game changers.

The area I marked is what I'd call the area of conflict. A ranged-three Unit on the Attack Boost Square can reach their corresponding highlighted areas (Blue Team can reach Blue and Yellow Squares, Red Team can reach Red and Yellow Squares). That's not to say you need to use a ranged-three Unit or that you need to "park" them on the Attack Boost Square, but this is a common tendency to gain "board control."
Notice, however, how the Premium Squares in the middle are out of reach and provide different advantages.
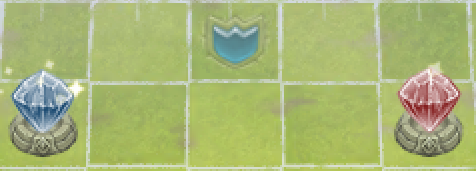

However, the key area is actually this:

The two Crystals are three tiles away from each other, but more importantly, an enemy Unit on the Attack Boost Square makes both Crystals vulnerable to area of effect attacks. For example...
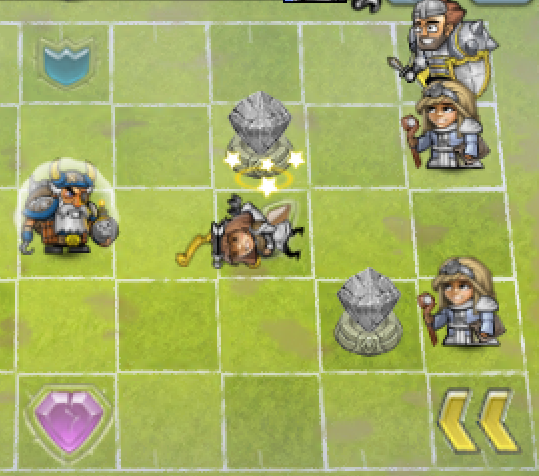
If one of the Dwarves's Unit was on the Assault Boost Square, the Crystals would receive 360 (or 300 for other Heroic Teams) damage in addition to the splash damage from the Grenadier.
So while you don't need to destroy the Crystals in this map to win the game, there are certain advantages in doing so. It's all determined who manages to hold on to the Premium Squares, which brings me to...
Initiative
The key to this map is who controls one--or both--of the Premium Squares in the middle of the map. Control of the Defense Boost Square can lead to the destruction or protection of the top Crystals. Control of the Assault Boost Square hastens your capability to destroy your opponent's Crystal, or prevent them from winning via that victory condition.
What's important to note, however, is that during the first round, each of those squares can be secured with three Actions. If you've managed to secure one of those Premium Squares with a sturdy Unit like a Knight or Paladin, it's difficult to dislodge them unless your opponent has a Knight or an Impaler.
Heroic Team
Each Heroic Team has its own advantages. Council for example has the Archer, and it's the best Unit to place on the Attack Boost Square since it has a range of three and deals a lot of damage; killing a unit with just two Actions is possible. The Dark Elves's Void Monk can abuse its movement of three squares per Action (either as part of hit-and-run tactics or to secure a Premium Square). But there's a significant advantage to Dwarves who manage to secure the Assault Boost Square due to how common splash damage is, in addition to miscellaneous benefits due to getting a higher bonus from Premium Squares, Pulverizer, the extra Assault Boost Square bonus from Engineer, or the Grenadier's ability to ignore line of sight (and aim for the targets you want, assuming they're in range).
There are subtleties to the trajectories of the splash damage of the Dwarves, and you can see the breakdown at Making and Breaking Games. If you're going for a destroy-the-Crystals victory condition, the key is in your ability to deal significant damage to Crystals while attacking your opponent's Units at the same time. Due to the sweet spot illustrated above, it's very likely to damage a Unit, at the same time damaging both Crystals.
If you're losing to Crystal destruction in this map, you might want to prevent your opponent from securing the Assault Boost Square.